Planning Calendar
The Planning Calendar allows you to manage your resources such as staff and trucks and allocate these to rental jobs.
Planning Calendar is accessed via Dashboard -> Planning Calendar. If this menu is not visible, please ask your Administrator to enable in User Setup Configuration for your login.
Step 1. Assign resources to rental jobs
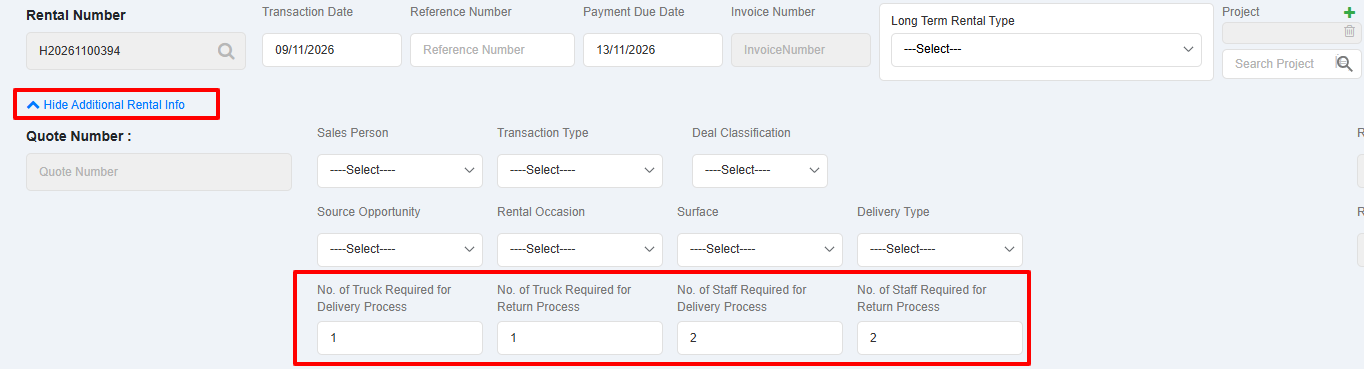
In the rental transaction screen, open the required rental. Click "See More Rental Info" to see further details.
Specify the following:
- Number of trucks required for Delivery
- Number of trucks required for Collection/Return
- Number of staff required for Delivery
- Number of staff required for Collection/Return
- Save the rental
Step 2. Open the Planning Calendar
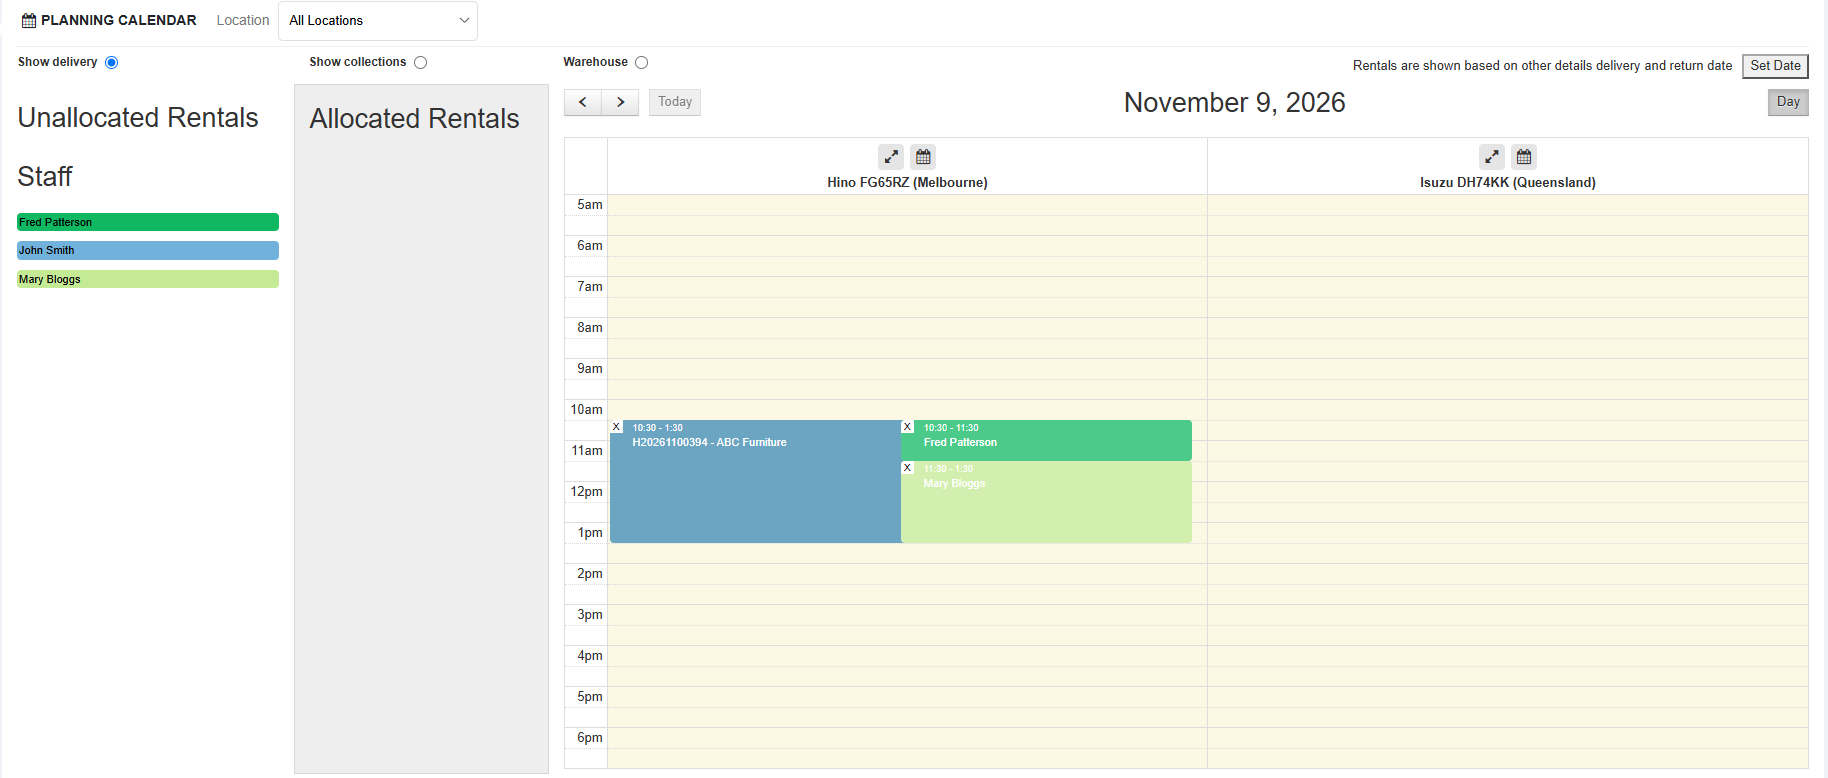
Open the Planning Calendar from Dashboard menu.
Navigate to the day/date using the > and < to scroll through the dates. You can click Set Date and select a specific date.

You will notice rentals in either Unallocated Rentals or Allocated Rentals areas.
Allocated Rentals - if the rentals were allocated specific Delivery / Return times (ie 10am Delivery, 2pm Return etc) then
Unallocated Rentals - if the rentals were not allocated specific Delivery / Return times
On the right side you will notice columns of Trucks (to create Trucks, go to Settings - Truck Configuration screen).
For Delivery - select Show Delivery on top
For Return / Collection - select Show Collections on top
Warehouse - to allocate tasks for the Warehouse staff
Step 3. Allocate jobs
Simply drag/drop rental job to the relevant truck to a time slot. You can then resize the duration depending on time required for Delivery.
Drag / drop one staff at a time to the job or to any time slot on the calendar as required.